Home
Inkscape 1
Getting Started with Inkscape
... and setting up a poster
In this lesson you will install and create your first Inkscape project, setting up a poster.
I. Getting Started
- Download Inkscape
- Open Inkscape
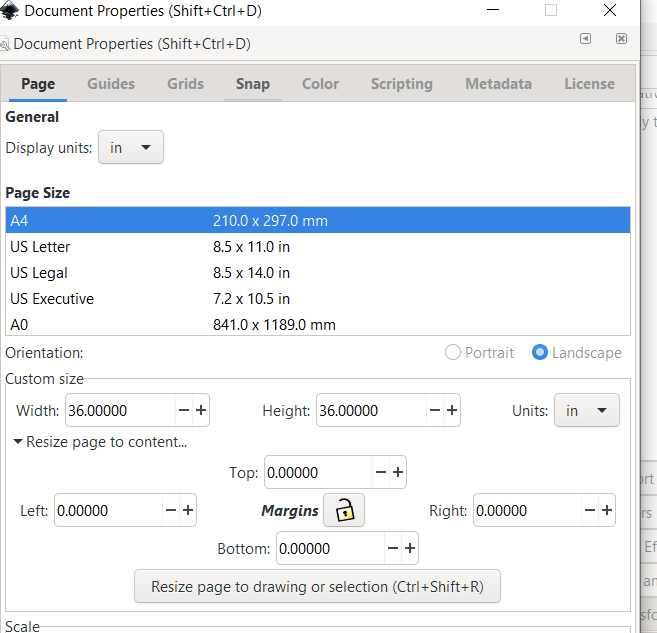
- Set your size for your poster:
- File → Document Properties → Page tab
- Look at the Custom Size box
- Change the Units to inches ("in").
- Change both the width and height to "36".
- At the top also change the display units to inches ("in")
- Save your project: File → Save
Layers: Some Examples
Like GIS programs, one of the values of vector editors like Inkscape is the capacity to overlay, render transparent, and to toggle on and off various layers. Unlike GIS, however, vector editors are not tied to spatial coordinates and allow greater manual customization.
In the following images you will see how I edited a series of maps a couple of years ago within one Inkscape project.
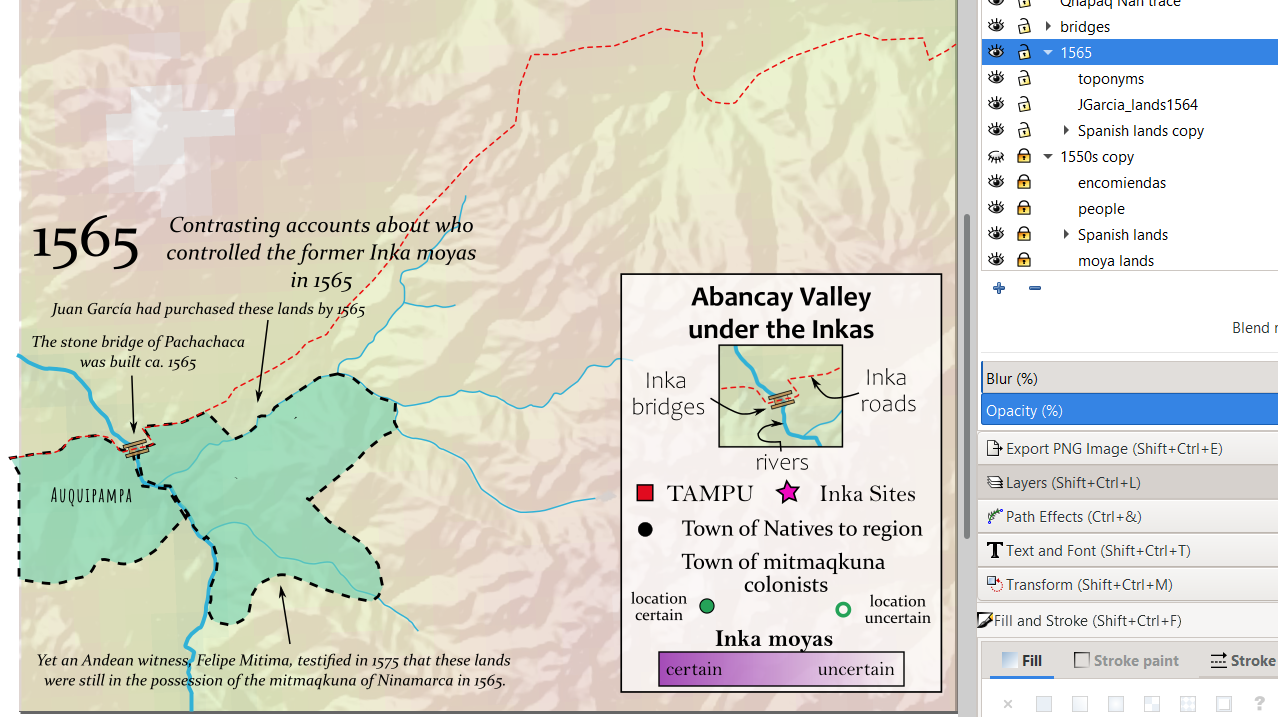
The terrain base maps were created in QGIS. Since rivers are hard to do in QGIS, I actually then added a new layer for rivers within Inkscape. I then added additional layers to show place names, roads, bridges, and ethnic groups. I also created the legend within Inkscape. QGIS and ArcGIS allow you to automatically generate legends for your maps which makes sense for more quantitative maps. However, for more qualitative maps, I was able to more easily customize and create more aesthetically pleasing legends.
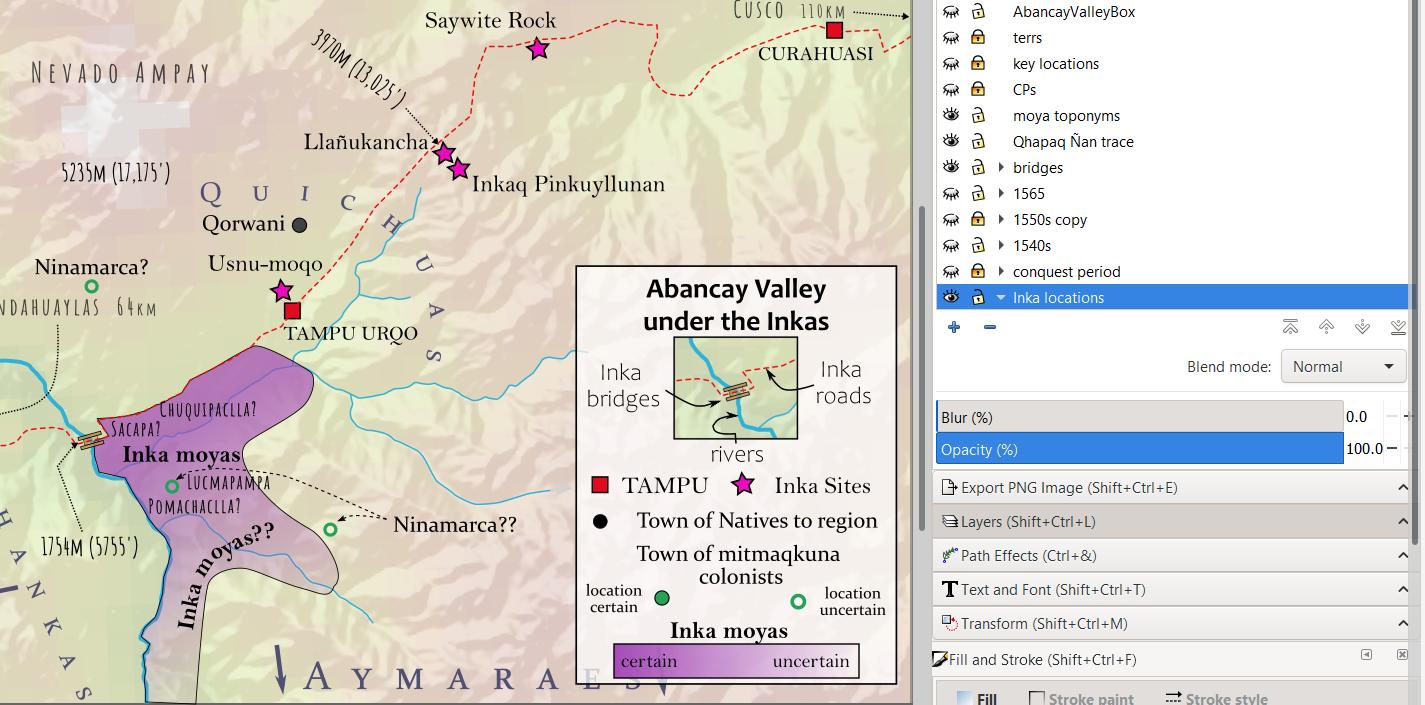 Map 1: This map adds a purple polygon to represent the approximate extents of Inka state-controlled territory in the Abancay valley. Note the use of a fading purple fill to show the portions of this territory I am less certain were under Inka control. Most importantly for this tutorial, note the Layer window on the righthand side. See how the "Inka locations" layer is visible (open eye symbol) while the conquest period, and colonial period layers remained hidden (closed eye).
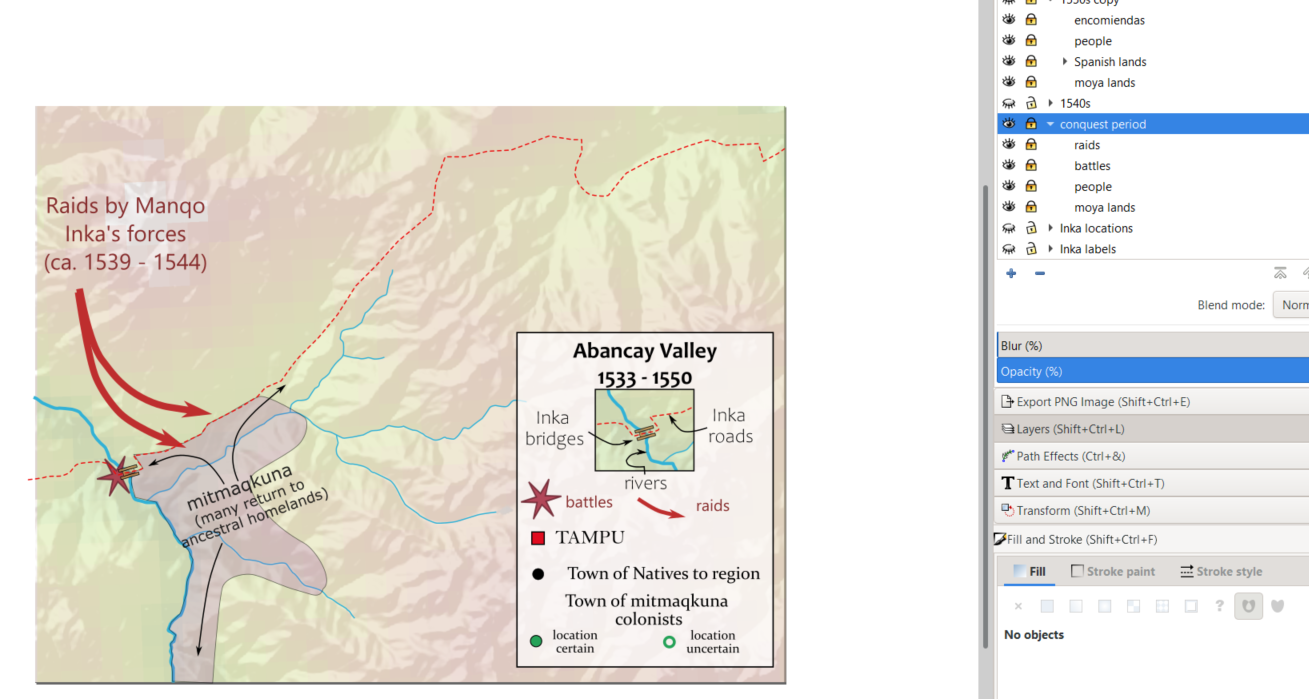 Map 2: This map shows the immediate aftermath to the Spanish invasion. The colonists brought in to work imperial lands returned to their homelands. Then, beginning in 1539, Manqo Inka leads a war of resistance against the Spanish and their Andean allies.
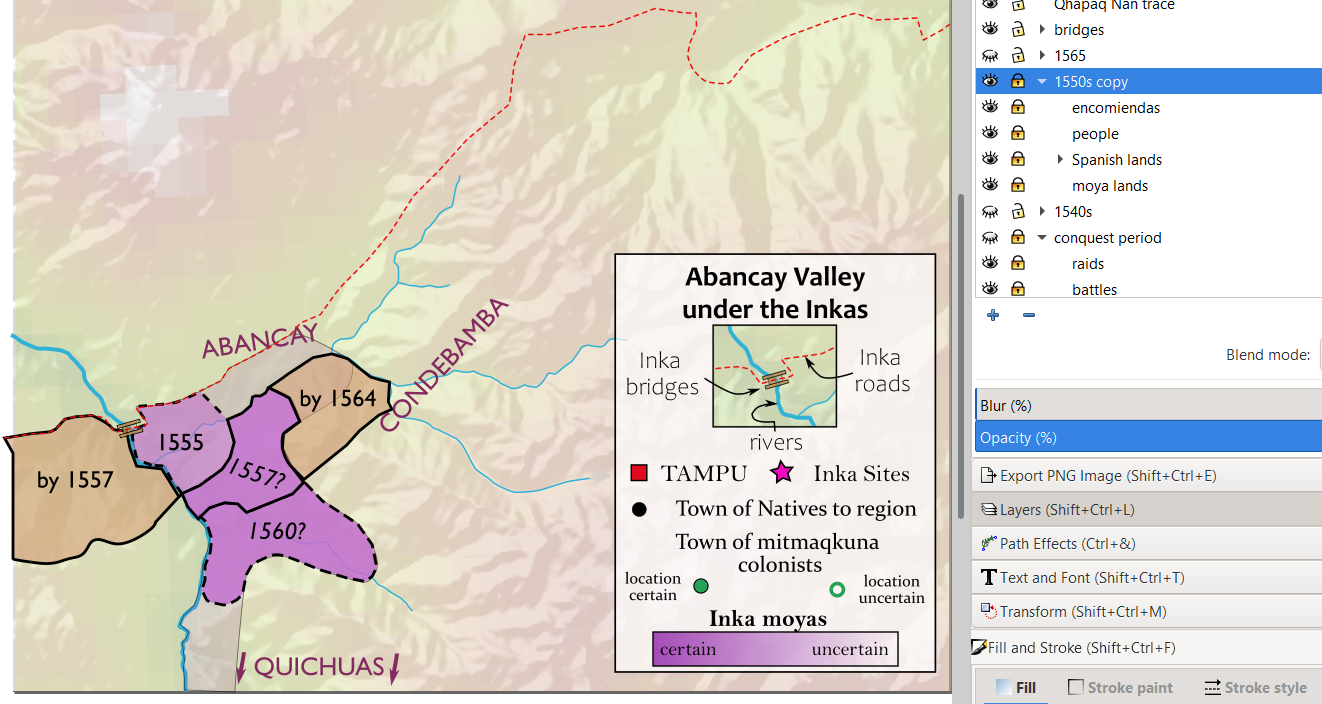 Map 3: Spanish land seizures. The different color polygons distinguish between land that was purchased from Indigenous groups and land that was just seized. Here, dashed outlines indicate greater uncertainty. Note: the legend needs to be updated as it still shows the symbols found in the Inka-era map.
 Map 4: Here I added some textual annotations to describe how some texts contradict about the transfer of these lands (never a surprise when dealing with European seizures of Indigenous lands).
 Map 5: One of the values of working with layers is you can hide some of your work. For example, in the cleaner, more polished maps above, I have hid some of the layers that helped me locate the places labeled on these maps. Here, however, you can see how I imported a modern topographic map and made it semitransparent to help me label certain locations.
II. Create your first layer: Gridlines for spacing out your poster
We can use layers for many things. One useful application is to create layers that help you plan or layout your poster and then hide that layer for the final product. For example, you can divide your poster into sections using gridlines and then, once complete, hide those gridlines.
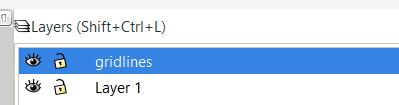
- First, create a layer called "gridlines" by clicking on the "Layers" window on the righthand side of the screen. (if it's not there select the Layer tab at the top of the screen → Layers)
- Select the plus (+) sign and name your new layer "gridlines"
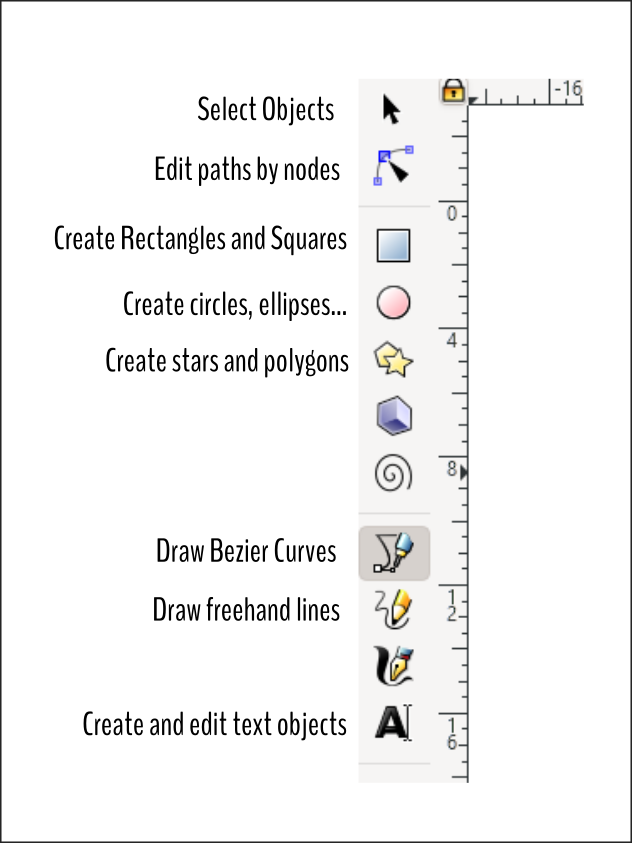
- With this new layer selected, use the Draw Bezier Curves tool on the left toolbar to draw your gridlines (see the annotated toolbar below). To draw level vertical or horizontal lines, hold the Control button as you draw your gridlines.
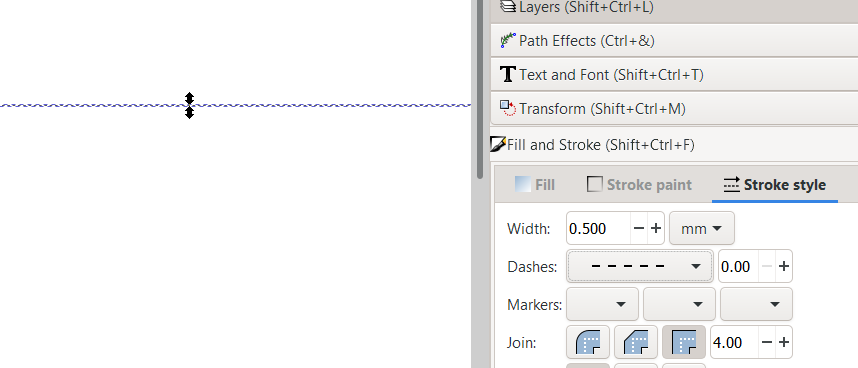
- After drawing in your first line, you can modify the line type, thickness, and color by selecting the Fill and Stroke window on the right side of the screen (if not there, select Object → Fill and Stroke).
- You can also draw rectangles and squares using the Create Rectangles and Squares button on the left toolbar. Use the same Fill and Stroke window to remove your rectangle's color fill.
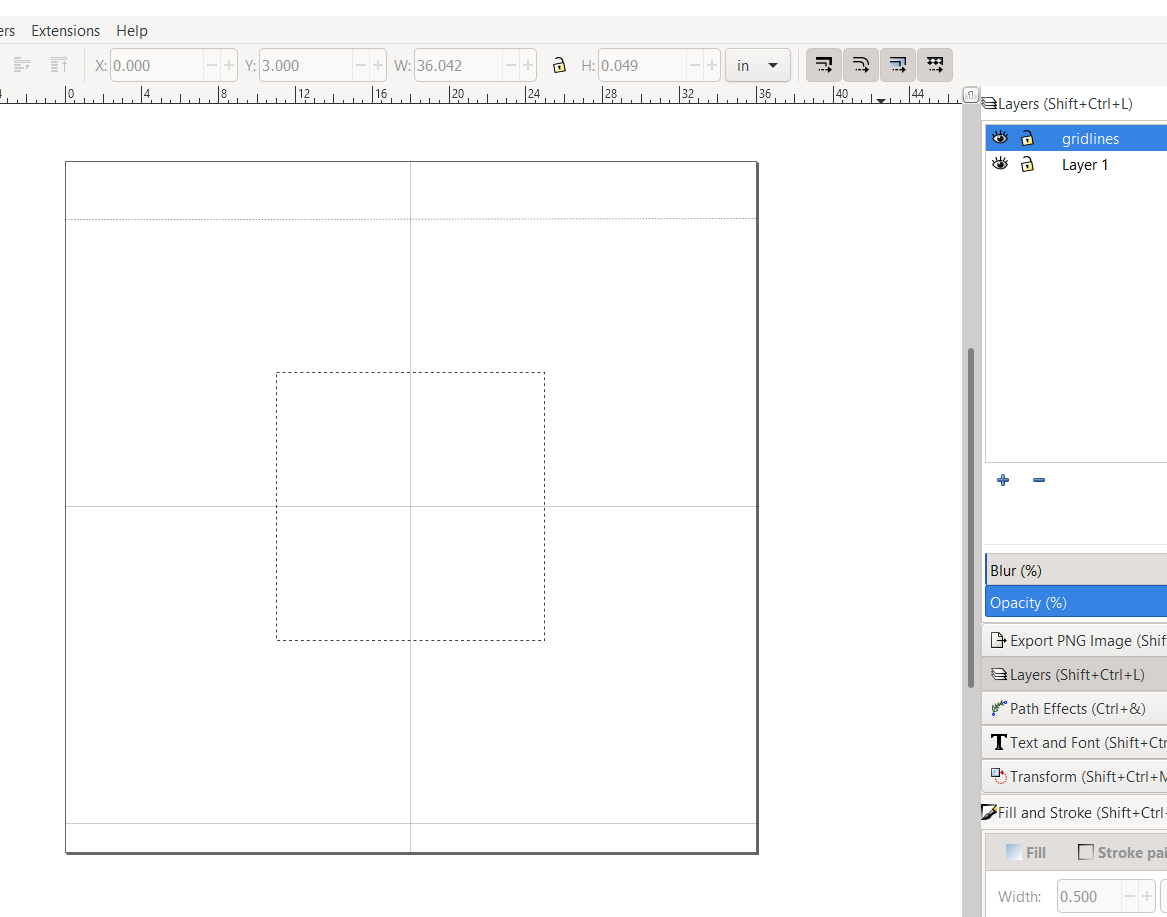 This is how I set up my poster. I reserved the top 2 or 3 inches and the bottom inch for a title and footnotes, respectively. I then divided the rest into four equal sections, where I will place text and images for the different sections of my project. Meanwhile, I cut out a middle square where I will place my central image. After completing my poster, I can then hide my gridlines layer so that only my "finished work" appears. Be creative how you choose to visually tell your story.
III. Create Title
- Select the Create and edit text objects tool from the left toolbar. Place it where you would like to put your title, left-click and type.
- You can chance the text font and font-size using the Text and Font window on the righthand side (under the Text tab at the top if not seen on the righthand side).
- Note: for some fonts, you can use a "Small Caps" version of the font by selecting in the Text and Font window → Features → Capitals → Small.
- To change the color of the font use the Fill and Stroke window.
- To rotate the text, use the Transform window.
You can also experiment with adding section titles, blown-up quotes, lists of citations at the bottom, etc.
IV. Add Images
- File → Import and select the image you wish to import.
- You can resize the image using the Transform window + Scale → check box for Scale Proportionally.
- To crop the image to a smaller size:
- First create a new layer and call it "crop boxes" or something like that.
- Drag a rectangle around the part of the image you want to keep.
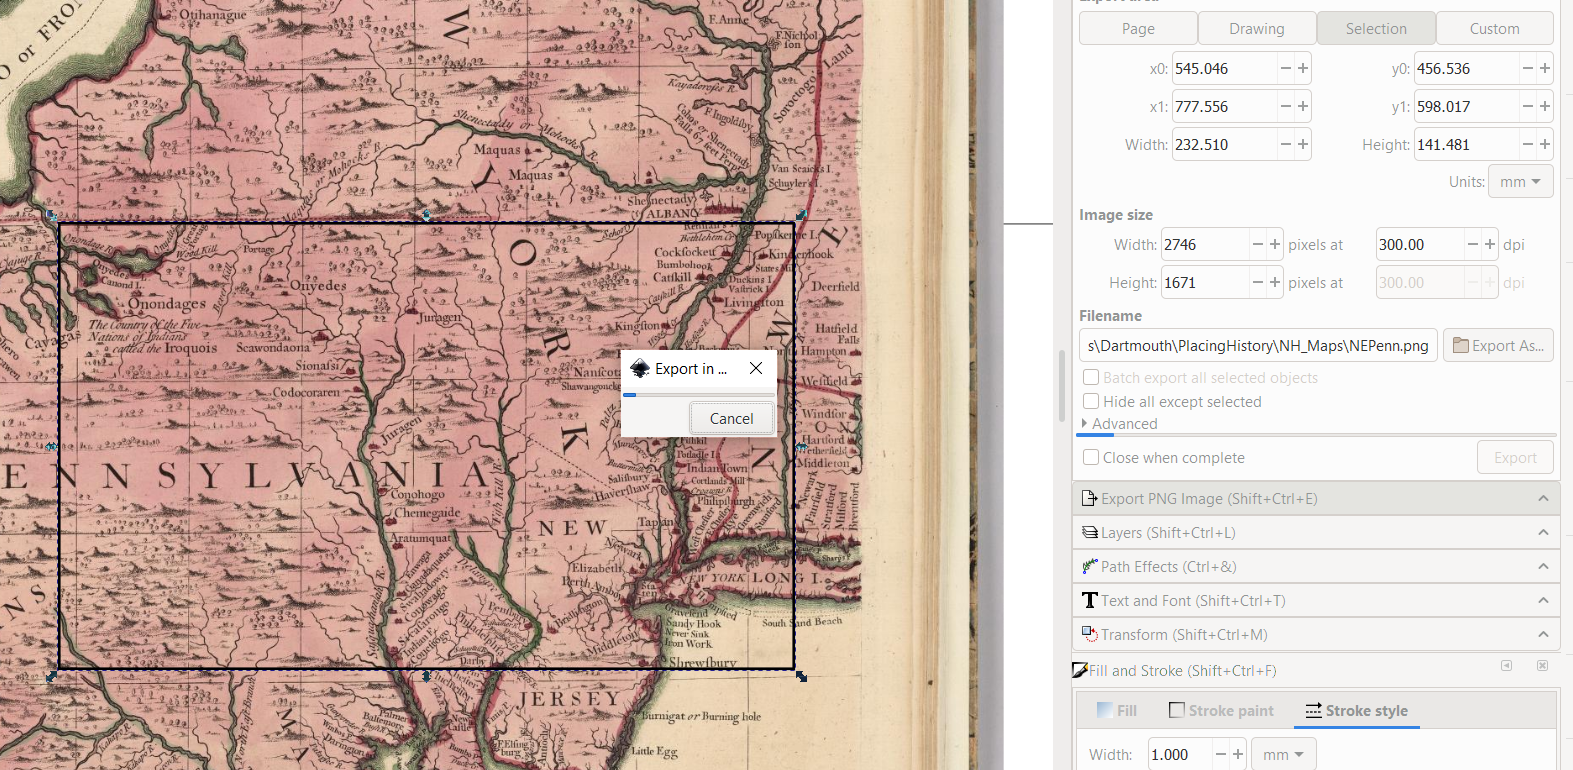
- You may use the Object → Set Clip tool to crop images. But, I find it easier to select the crop box you just created, then from the Export PNG Image on the right side of the screen, select Selection, make sure the dpi is 300 or higher, select the file name and where you wish to export it to in the Export As box, and, finally, press Export.
- Import the new cropped image back into your Inkscape project using File → Import.
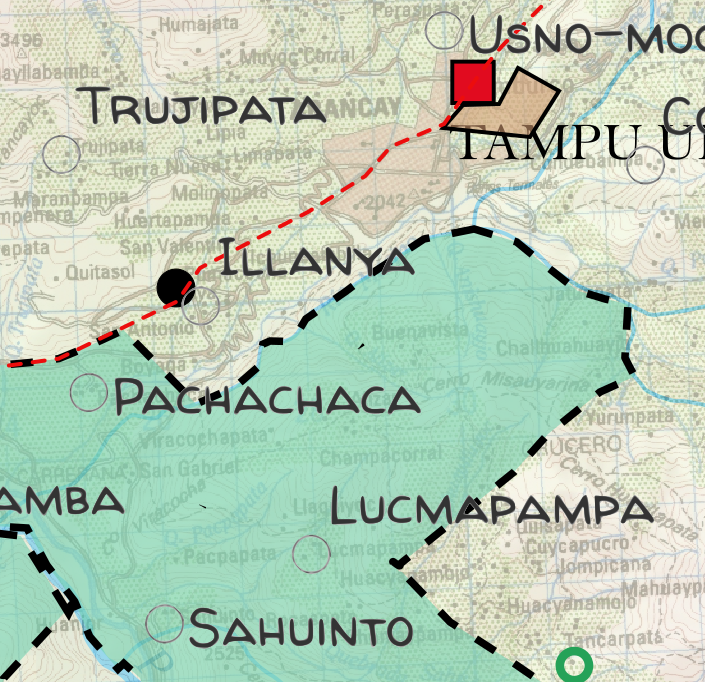
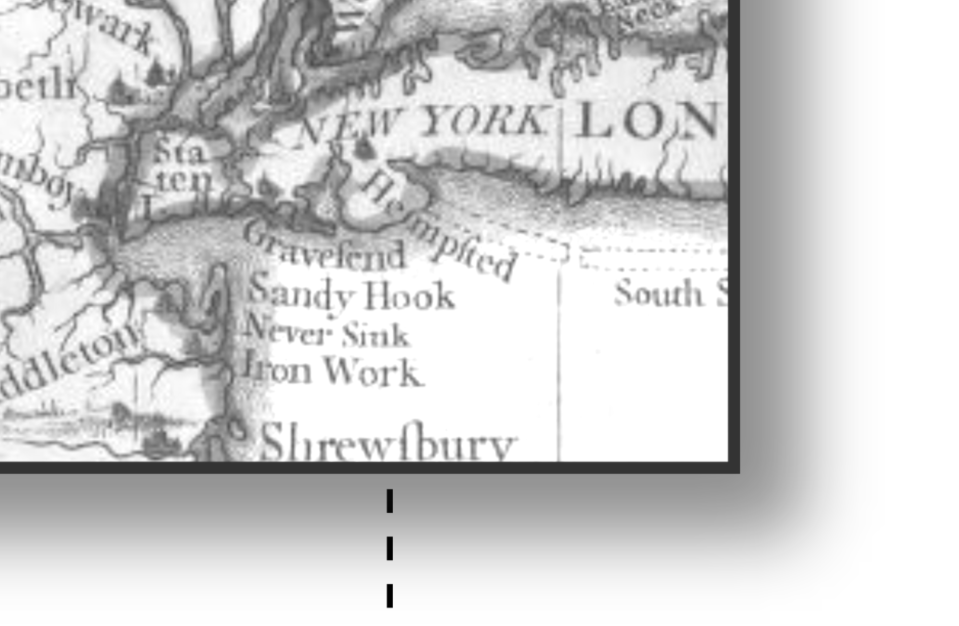
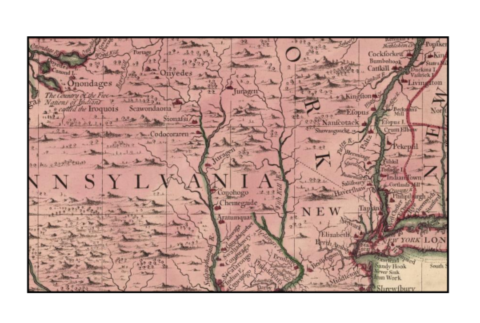 The cropped portion of the map that I have re-imported into my project.
V. Edit Images
You can experiment with changing the color of an existing image using the tools found in Filters → Colors. The most useful filter might be transforming a color image into a black and white one using the Greyscale tool. In my case, I just converted the map to Greyscale and added a drop shadow to my image using Filters → Shadows and Glow → Drop Shadow.
 My new map, after converting it to greyscale and adding a drop shadow.
You can add paths, shapes, and labels to your image by creating new layers on top of your image.
In my case, I am going to add a layer called "Occom's travel" and then create a thick, semitransparent line tracing Occom's imaginary* travels through northeastern Pennsylvania (*this is "dummy data" that I am just making up for the sake of this tutorial). I can change the Opacity for each item using the Fill and Stroke window or for an entire layer using the Layer window.
VI. Add Annotations
You can also add annotations to the image by creating a new layer for annotations and placing them over your image. To make your text more visible over the image, add a rectangle behind the text to serve as a text box. If you still want a portion of the image to appear through the textbox, adjust the box's opacity. The result may look like something like the image below.
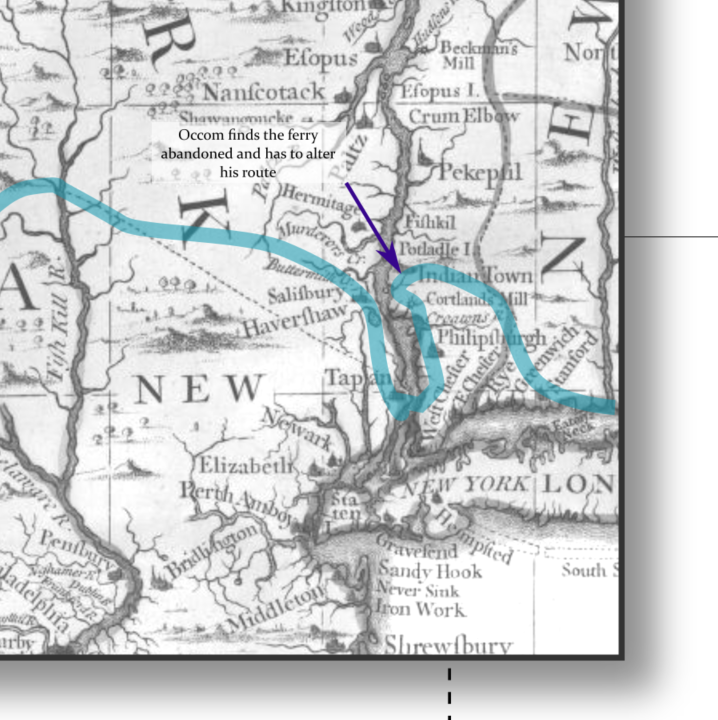 Adding in a line recording Occom's route and annotations with commentary (this is "dummy data" - so it's not based on real events or even real research). Note, I added in a white rectangle behind the annotations I added to make it more clear, but made this rectangle semi-transparent so as to not completely obscure the original map behind it.
Still lots of work to do, but your poster so far may look something like this:
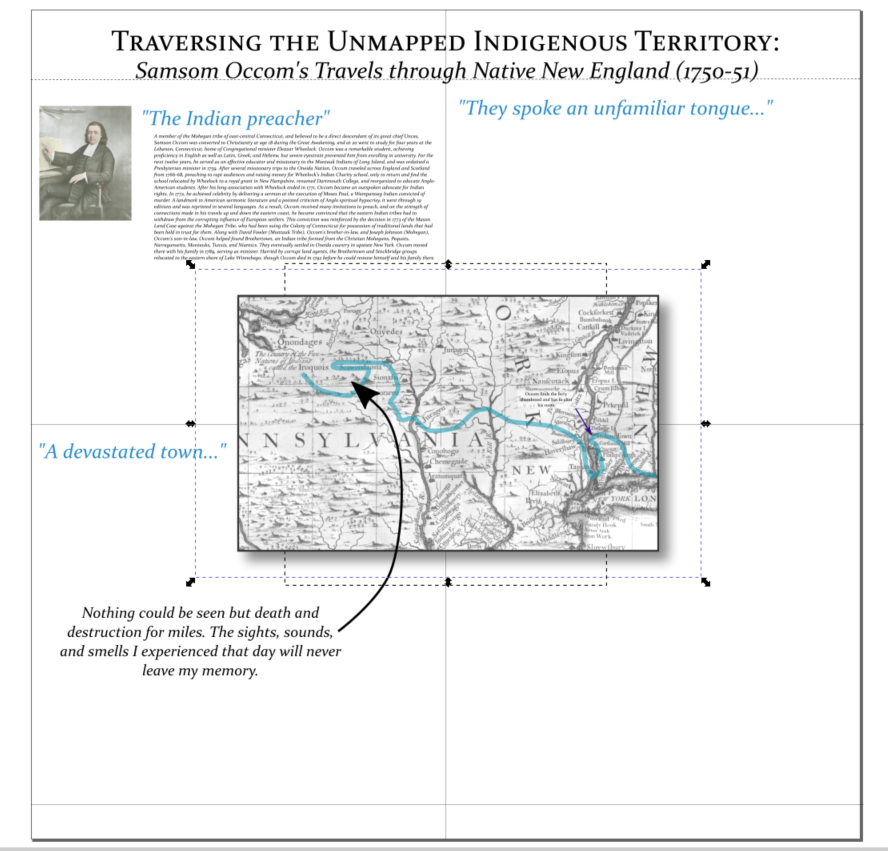 Example of what your poster draft may look like after this initial setup.
VII. Export your poster
When your poster is complete, you can follow the instructions below to export a final copy. Make sure you have hidden all layers you do not want shown using the Layers window and selecting the eye symbol (closed eye = hidden).
- Select Page from the Export PNG Image window. Choose a dpi of 300 to export a high resolution copy of your final poster (if the file size is too big you may have to choose a smaller dpi later, but you want to keep it as close to 300 as possible for printing). Choose a smaller resolution if you are just saving a digital copy. Choose where you will export it to. Select Export.
- Open your exported map to confirm it appears as you wanted it.
- Save your project.
- Bring a digital copy of your poster to the Evans Map Room for printing on a flash drive or email it to yourself.